Showing posts with label DIY. Show all posts

Wednesday, November 28, 2012

December daily

Hi everyone!  I know I have been slacking on my blog posts.  I have been very busy with work and some family stuff and I just couldnt find enough time to blog at the moment.

But yey for me, I'm able to make some few projects while I was away from the blogging scene.  Recently, Kathy Orta of Paper Phenomenon did a series of Youtube video tutorials in making her December Daily.  Wondering what a december daily is?  Its a scrapbook/smashbook or whatever you want to call it that was started (if im correct) by Ali Edwards a few years back and it has been a hit.  Its where you record the memories, things, events, traditions and whatever it is that makes you look forward to December and most especially Christmas.  Some may start as early as Thanksgiving and end it up to New Year. It doesnt matter, its your book and you can do it anyway you want it to be.

Anyways, I have made mine using Kathy's Tutorial on a lapbook type album at it was a great project I tell you.  It seemed to much work but she taught it well and I was able to make it. 

Here's a quick video of a flipthru of my 2012 December Daily, and I hope it will also inspire you to make your own and record your holidays this year.


And by the way, incase this looks complicated to you all, Kathy has another video tutorial series on Youtube making a december daily using cards and envelope.

Thanks!


Friday, October 19, 2012

DIY - Heidi Swapp's Memory File System

A few weeks ago, a good friend Cathy introduced me and some ladies to Heidi Swapp's Memory File System.  And as always, I got curious and started searching for websites and of course, Heidi's blog as well.  It looks so interesting and seemed to be another simple way of preserving memories.  For Heidi, she says, its an interactive scrapbook - that can hold about 25-50 photos depending on the accessories you are putting in. 

I can't find any of this here in the Philippines and ordering online is out of my options since international shipping is way too much and I can't afford it for now, even if the products are affordable and reasonably priced.

So yes, like any crafter would, I made my own using what I have available.  Recently, we celebrated my dad's 60th birthday and his retirement so I wanted to make one to store photos from that event.

So here's a tutorial of how I made my Memory File System.

Enjoy!
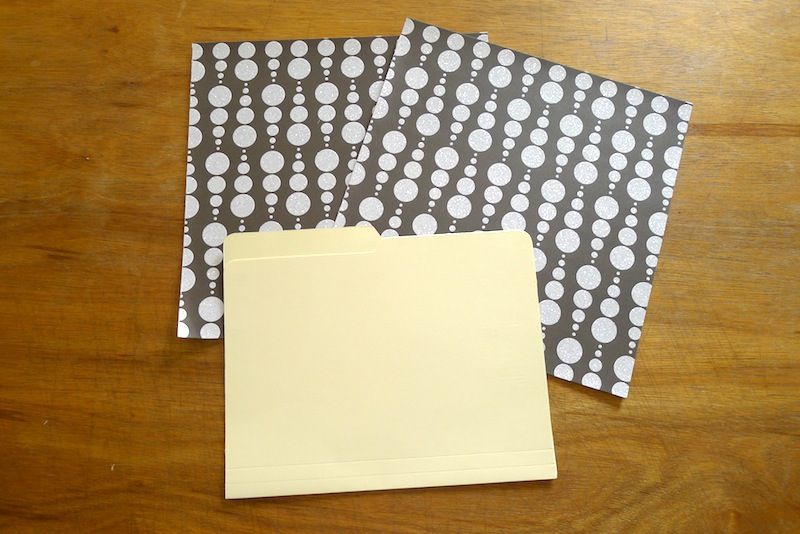
Gather your materials.  12x12 paper/cardstock of your choice,  additional paper for accent/embellishment, adhesive, scissors and short file holder
Choose 2 pcs. -  2 designs of 12x12 paper to cover the inside and outside part of the file folder
Trace the folder and trim
Apply adhesive onto the file folder, making sure to add it to the edges of the folder to prevent them from peeling off.  Use a good adhesive, adhere the prepared designer paper and trim off excess.
This is how my outside cover looks like laying flat on the table.
Repeat the process to cover the inside part of the folder, make sure to leave a little gap between the paper so you won't have a problem closing it.
You can skip this part if you don't want to add additional pages inside.  You can also use mini file folders and repeat the process of covering the inside and outside part.  But for this project, I made a pattern for a top note shape, about 12 inches wide and 9 1/2 inches in height.  Traced it to a chosen cardstock (you can choose double sided this time if you want) and cut.
I prepared 2 of the top note shaped paper scored at the center to make a 6x9 1/2 page
Also, I made a flip page to store more photos and for journaling.  I cut 4 1/2 inches wide paper out of my 12x12 paper, holded and stack 3 papers (for this project) and folded them 1 page longer by 1 inch. Say 1st page is at 4 inches in height, the next page would be 5, and so on.
Finished project.  Front
1st spread when opened.


Attached the pages using staple wires.  You can opt to stitch them.
Hope to see your work soon.

Thanks!