A few weeks ago, a good friend
Cathy introduced me and some ladies to
Heidi Swapp's Memory File System. And as always, I got curious and started searching for websites and of course, Heidi's blog as well. It looks so interesting and seemed to be another simple way of preserving memories. For Heidi, she says, its an interactive scrapbook - that can hold about 25-50 photos depending on the accessories you are putting in.
I can't find any of this here in the Philippines and ordering online is out of my options since international shipping is way too much and I can't afford it for now, even if the products are affordable and reasonably priced.
So yes, like any crafter would, I made my own using what I have available. Recently, we celebrated my dad's 60th birthday and his retirement so I wanted to make one to store photos from that event.
So here's a tutorial of how I made my Memory File System.
Enjoy!
 |
| Gather your materials. 12x12 paper/cardstock of your choice, additional paper for accent/embellishment, adhesive, scissors and short file holder |
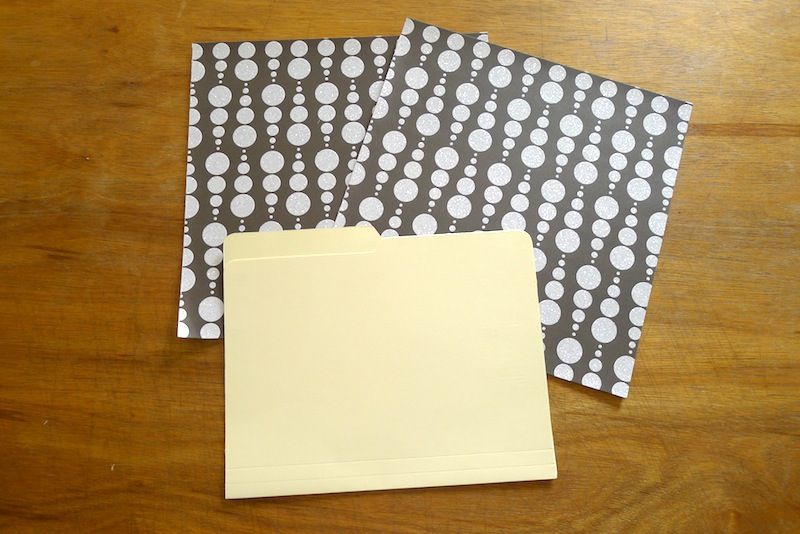 |
| Choose 2 pcs. - 2 designs of 12x12 paper to cover the inside and outside part of the file folder |
 |
| Trace the folder and trim |
 |
| Apply adhesive onto the file folder, making sure to add it to the edges of the folder to prevent them from peeling off. Use a good adhesive, adhere the prepared designer paper and trim off excess. |
 |
| This is how my outside cover looks like laying flat on the table. |
 |
| Repeat the process to cover the inside part of the folder, make sure to leave a little gap between the paper so you won't have a problem closing it. |
 |
| You can skip this part if you don't want to add additional pages inside. You can also use mini file folders and repeat the process of covering the inside and outside part. But for this project, I made a pattern for a top note shape, about 12 inches wide and 9 1/2 inches in height. Traced it to a chosen cardstock (you can choose double sided this time if you want) and cut. |
 |
| I prepared 2 of the top note shaped paper scored at the center to make a 6x9 1/2 page |
 |
| Also, I made a flip page to store more photos and for journaling. I cut 4 1/2 inches wide paper out of my 12x12 paper, holded and stack 3 papers (for this project) and folded them 1 page longer by 1 inch. Say 1st page is at 4 inches in height, the next page would be 5, and so on. |
 |
| Finished project. Front |
 |
| 1st spread when opened. |
 |
| Attached the pages using staple wires. You can opt to stitch them. |
Hope to see your work soon.
Thanks!


Love it Ana! Looks like you got your mojo back!!!
ReplyDeleteThanks Wendi!!! Yup, I got it back... I hope it wont go on vacation again, LOL
ReplyDeleteSuch a great job!! Love it Ana!
ReplyDeletePretty darn amazing Ana! Great job!
ReplyDeleteI know i am commenting about 6 months after u created this but i just wanted to say thank u thank u! I have been trying to make my own hs folders bc they r just too expensive! There is a great tutorial on utube on more hs embellishments by omgitsemily! Thank u so much!
ReplyDeleteThank you thank you!! Im trying to make memory files for a girls camp and want to do cheap as we need to make a bunch. This tutorial is fabulous! I never thought to trace the folder! Thank you!
ReplyDelete